Clipless Pedals Clicking — How to Diagnose the Noise
Clipless pedal clicks have gotten complicated with all the guesswork flying around on cycling forums. “Adjust your spring tension.” “Replace the cleats.” “Buy new pedals.” I followed that exact advice for three weeks last summer, chasing a clicking sound through my Shimano SPD-SL setup like a man possessed. Replaced the cleats. Retorqued the bolts. Nearly dropped $180 on a fresh pair of pedals. The actual culprit? A single loose washer sitting under my cleat plate — probably cost 40 cents. Today, I’ll share the diagnostic process I wish I’d had then.
Here’s the frustrating reality: that click you’re hearing could originate from five completely different places. Generic forum advice solves maybe 20% of cases. The other 80% requires actual isolation work. So, without further ado, let’s dive in.
First Rule Out the Obvious Culprits
Start here. Every time.
Cleat bolt torque and cleat wear account for roughly 70% of pedal clicks. Five minutes of triage beats two hours of guessing.
Grab a 4mm hex key and check those cleat bolts. Shimano SPD-SL spec is 5–7 Nm. Look Keo runs 6–8 Nm. No torque wrench — most cyclists don’t own one, honestly — just apply steady pressure. Think firm handshake, not gorilla grip. Loose bolts create tiny movements under load, and tiny movements create noise. That’s the whole problem in one sentence.
Now look at the cleats themselves. Visual inspection beats everything else here.
- Shimano SPD-SL cleats have a wear indicator line molded right into the body. Worn flush or gone entirely? The cleat is done.
- Check the leading edges where your foot sits. Sharp edges are normal. Beveled, rounded edges mean thousands of kilometers have passed through that plastic.
- Look for exposed metal or discoloration — any separation between the plastic body and the metal spine underneath.
- Run a finger across the underside. Smooth is good. Pitted or rough texture means wear has set in.
Probably should have opened with this section, honestly. Most riders skip straight to tightening random things and wonder why nothing improves.
Cleats looking fresh and bolts snug? Move to the next step. Cleats worn? Replacement sets run $35–50. Buy them, install them, ride. Problem solved in most cases — immediately.
How to Tell If the Noise Is Actually the Pedal
Here’s the isolation test that separates cleat noise from pedal noise. It takes about ninety seconds.
Unclip from the pedal. Put the bike on a stand and spin the pedal by hand. Listen carefully — but more importantly, feel carefully. Worn bearings make a rough, grinding sensation you’ll catch through your palm before your ears register anything. The axle just won’t spin cleanly. That tactile roughness is your diagnostic flag.
Most cleat clicks disappear during this test entirely. That’s actually good news. The noise isn’t internal.
Next, clip in and ride hard out of the saddle — sprinting, climbing a short rise, anything that loads the pedal differently than seated riding. If the click changes character or vanishes when you’re standing, that points squarely to the cleat or mounting hardware. Pedal bearing noise doesn’t care whether you’re seated or standing. It just gets louder with load either way.
Grinding that persists through both tests means the bearings need attention. Most road pedals accept a standard bearing kit — usually $25–40 — and a 10mm wrench handles the axle removal. It’s rebuild territory, not replacement territory. Don’t make my mistake of shopping for new pedals before checking this.
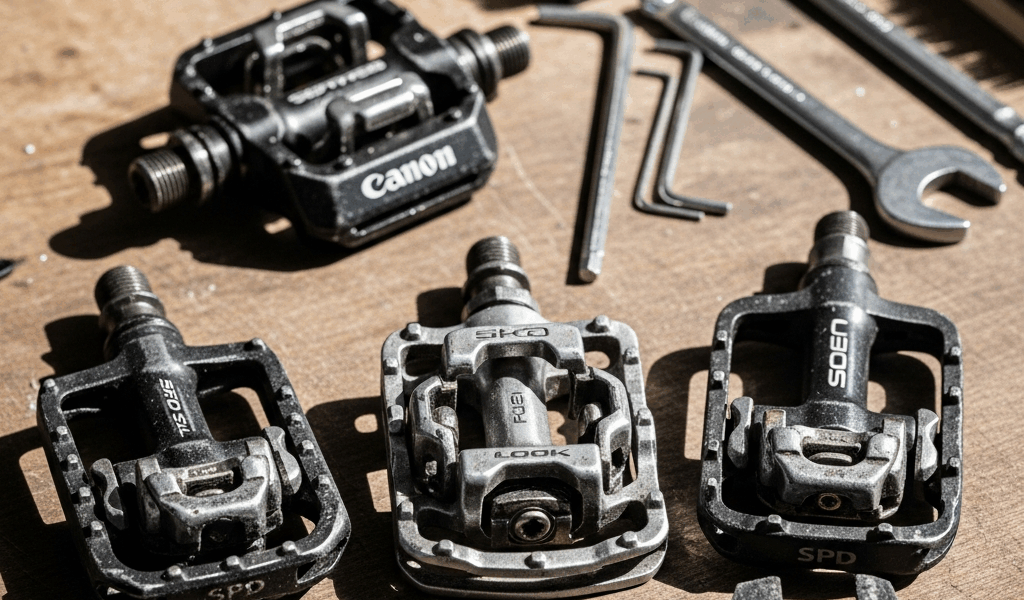
Fixes by Pedal System — SPD-SL, Look Keo, SPD
Shimano SPD-SL
The tension adjustment screw on SPD-SL pedals controls how tightly the cleat sits inside the retention cage. It’s a small Phillips screw sitting near the cage on the pedal body — easy to miss. Half-turn increments tightening it increases retention and often eliminates micro-movement noise. Don’t crank it down completely. You should still release your foot with normal lateral pressure.
For lubrication, dry lube only on the contact points where cleat meets cage. I’m apparently a Finish Line Dry Lube person and it works well for me, while Shimano’s own dry lube never quite stuck around long enough. A PTFE-based product either way. Wet lube attracts grit, muddies the interface, and creates more noise than you started with. I learned this the expensive way — don’t make my mistake.
Look Keo
Look Keo plastic cleat bases crack. This is not rare — it’s practically a scheduled maintenance item. The plastic splits under the ball of the foot, right where pedaling pressure concentrates, typically somewhere around the 2,000–3,000 kilometer mark. A cracked base allows lateral movement in the binding. Lateral movement clicks. Every single time.
Flip the cleat over and inspect the underside carefully — the face that contacts your shoe. Hold it up to actual light, not dim garage light. Hairline cracks are genuinely easy to miss until you’re looking for them specifically. Any visible cracking or separation along the edges where plastic meets the metal mounting plate means replacement, full stop. No adjustment fixes structural failure.
SPD
Mountain, touring, gravel — SPD covers a lot of ground. The system uses a single retention nut on the shoe-side of the cleat, and clicks here almost always trace to a loose nut or worn spring tension inside the pedal body. Two places to check, in that order.
Remove the shoe and feel the cleat nut directly. It should not move at all. Any play means a 3mm hex key from underneath the sole fixes it — carefully, because the threads in an aluminum cleat plate strip faster than you’d expect. Gentle pressure and patience.
Spring tension adjusts with an Allen wrench at the pedal body. Tighter spring reduces accidental releases and sometimes eliminates play-related noise entirely. Check your specific pedal’s manual for the exact adjustment point location, since it varies across SPD models.
When the Click Is Coming From the Shoe, Not the Pedal
Frustrated by three full weeks of pedal-focused adjustments, I finally discovered my real culprit lived in the cleat mounting area of the shoe itself — not the pedal, not the cleat, but the hardware sitting between them.
Try the tap test. Pull the shoe off the bike entirely. Hold it cleat-side down in one hand and tap the cleat sharply with a knuckle. Feel any movement or hear a dull thud instead of a solid sound? Movement means loose hardware somewhere in that stack.
Three specific things to check:
- Cleat bolts — Retorque them even if you tightened them yesterday. Vibration backs bolts out faster than most people expect.
- Cracked cleat plates on carbon soles — Carbon is stiff but brittle. A hairline crack under the cleat mounting area allows rocking under load. Use magnification if you have it. Repair shops can sometimes epoxy these successfully — sometimes.
- Worn cleat washers — The rubber or plastic washer under each bolt compresses with use. Compressed washers reduce clamping force. A replacement pack runs about $8. Replace all three at once while you’re in there.
The tap test catches things that visual inspection walks right past. That $8 washer pack solved three weeks of frustration for me. Most riders never think to check this — and that’s exactly why the forums are full of people still guessing.
When to Replace vs. When to Adjust
Shimano SPD-SL cleats typically run 3,000–5,000 kilometers before retirement, less in wet or muddy conditions. Look Keo cleats land in similar territory. SPD cleats outlast both — closer to 5,000–8,000 kilometers of real use. At typical amateur mileage, figure one season to two years depending on how much you ride.
Replacement cleats cost $35–50 and take maybe 15 minutes to swap. Pedal bearing service runs $40–80 and requires either shop tools or a willingness to learn on the job. New pedals — $120 on the low end, $300 if you’re looking at Dura-Ace or comparable.
Here’s the diagnostic sequence worth bookmarking:
- Torque the cleat bolts and inspect cleats visually for wear indicators.
- Spin the pedal by hand — feel for bearing roughness before listening for it.
- Ride hard out of the saddle. Click disappears? It’s cleat or mounting hardware, not the pedal internals.
- Run the tap test on the shoe with cleat attached.
- Address system-specific details: SPD-SL tension screw, Keo cleat underside inspection, SPD retention nut and spring.
- Bearings still feel rough after all of that? Service or rebuild — don’t replace yet.
That sequence solves the problem 95% of the time. The remaining 5% needs a bike shop with bearing press tools and diagnostic experience you honestly don’t need to develop yourself. That’s what they’re there for.

Leave a Reply