Figure Out Which Type of Brake Is Rubbing
Brake rub has grown more complex with the conflicting advice flying around. Rim brake tips mixed in with disc brake fixes, forum posts from 2009 still ranking on Google — it’s a mess. But here’s the thing: brake rub is almost always fixable in under ten minutes. You just have to know which brake type you’re actually dealing with first.
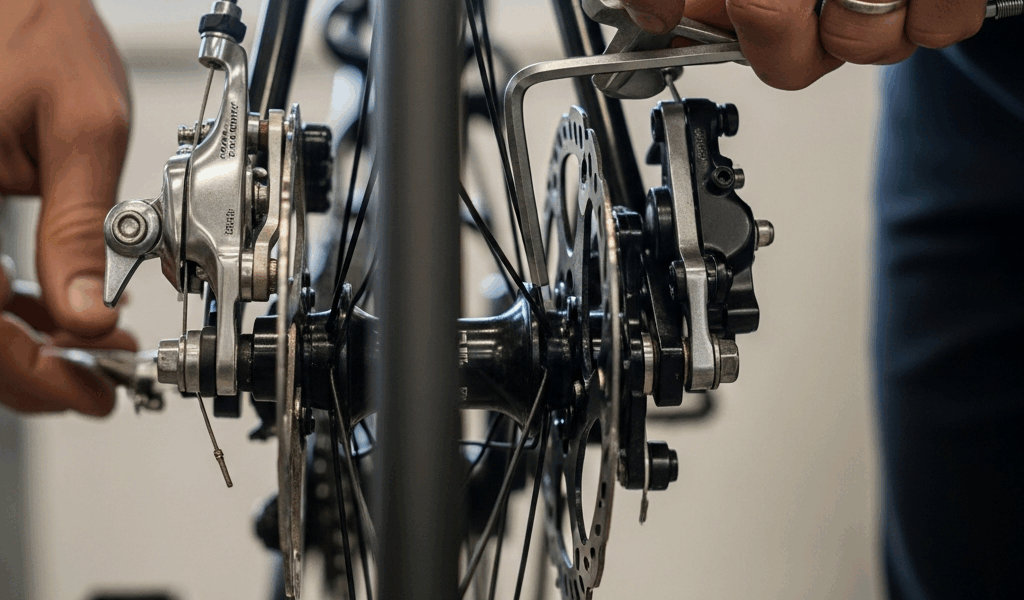
Spin your wheel and listen. Rhythmic scraping — once per rotation, like clockwork — that’s rim brake rub. Constant hissing, or noise that shows up randomly with no pattern? Disc brake rub. These two problems share almost nothing in common, fix-wise. Knowing which one you have before touching anything is the whole ballgame.
Look at your setup. Rim brakes clamp the metal rim itself — you’ll see the pads sitting right beside the wheel. Disc brakes clamp a rotor mounted near the hub. Once you’ve identified yours, skip straight to the matching section. Side-step the error I made of trying rim brake logic on a disc setup. I lost forty minutes on a group ride outside Asheville doing exactly that.
Fixing Rim Brake Rub in Three Steps
As someone who once stood on the shoulder of Route 9 in upstate New York on a sweltering July afternoon listening to my brakes scrape with every single wheel rotation, I spent real time learning the ins and outs of rim brake rub. Today, I will share it all with you.
Step 1: Check the Wheel Seating
The wheel has to sit fully in the dropout — that’s non-negotiable. Quick-release setup? Flip the lever open, reseat the wheel by pressing it down firmly with both thumbs, then close the lever with enough resistance that your palm actually hurts a little. Thru-axle? Unscrew it completely, pull the wheel, reinstall it clean, then torque the axle back to spec — usually somewhere between 100 and 150 newton-meters, depending on the fork manufacturer. My Cervélo fork calls for 130 Nm. Yours might differ. Check the crown or the derailleur hanger — the number is usually stamped there.
Spin the wheel. Still rubbing? Move on.
Step 2: Center the Caliper
Find the single bolt holding the rim brake caliper to the frame or fork. Loosen it — maybe half a turn, no more. You want movement, not removal. Now squeeze the brake lever hard, three times. On that third squeeze, hold the pressure and tighten the bolt back down while your hand is still clamped on the lever. This lets the caliper self-center around the rim. Don’t crank the bolt. Snug is enough — overtighten it and you’ll strip threads, and a new caliper bolt on a Sunday afternoon is not a fun errand.
Spin the wheel. Better?
Step 3: Use the Barrel Adjuster
The barrel adjuster lives either on the lever body or at the cable entry on the caliper itself — a small cylindrical dial you can turn with your fingers. What you’re chasing is equal pad gap on both sides of the rim. If the rub favors one side, turn the barrel adjuster counterclockwise a quarter turn. That pulls a little cable slack and opens the gap on the tight side. Test. Quarter turn. Test again. Repeat until both pads mirror each other.
That’s usually it. Seriously.
One thing worth mentioning — and is worth flagging first this, honestly — if your pads are worn unevenly or angled wrong, they’ll keep rubbing no matter how perfectly you center the caliper. Look at the pad face. It should contact the rim squarely across the full surface. Toed-in pads, glazed pads, pads worn down on one corner? Those need replacing, not adjusting. A fresh set of Kool-Stop Continentals runs about $18 and fixes what no amount of barrel-adjuster fiddling ever will.
Fixing Disc Brake Rub Without a Truing Stand
Disc brake rub is trickier. The culprit is almost always a misaligned caliper, a bent rotor, or — lucky you — both simultaneously. But what is disc brake rub, exactly? In essence, it’s the rotor dragging against one or both brake pads during rotation. But it’s much more than that, because unlike rim rub, the source can shift depending on heat, load, and axle torque.
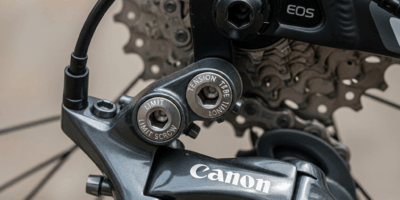
Realign the Caliper
Loosen both caliper mounting bolts — not out, just free enough that the caliper can float side to side. A quarter to half turn with a 5mm hex wrench usually does it. Road disc brakes generally run either post-mount or flat-mount. Post-mount bolts thread into the back of the caliper. Flat-mount bolts go directly into the frame. The caliper moves differently between the two, but the adjustment principle is identical.
Squeeze the brake lever firmly and hold it. The pistons push outward and nudge the caliper into natural alignment with the rotor. While keeping that lever pressure — don’t let go — tighten both bolts back down, alternating sides. Quarter turn on the left, quarter turn on the right, back and forth until they’re snug. Release the lever.
Spin the wheel. The rub should be gone or nearly gone. That’s what makes this fix endearing to us shade-tree mechanics — it genuinely works, and it costs nothing.
True a Slightly Bent Rotor
Caliper centering didn’t solve it? The rotor is probably bent. A Park Tool RT-1 truing fork runs about $40 at any decent shop and is the right call here. That said, a minor bend — light contact, intermittent scraping — can be nudged back by hand if you’re patient.
Spin the wheel slowly and watch the rotor pass through the caliper. Note which side it rubs — left pad or right pad. Rotors bend toward the side they’re rubbing. Rubs on the right? The rotor deflected right.
Stop the wheel. Fold a clean rag over the rotor on the bent side. Press gently inward with your thumb — not a shove, a nudge. Spin and check. Repeat in the smallest increments you can manage. Overcorrection happens fast and then you’re back to square one, just on the other side.
If the scraping is loud or visible to the eye, stop. A bent rotor past roughly 0.5mm — about the thickness of a credit card — needs a truing stand or a mechanic. Hand correction at that point makes things worse, not better.
Why the Rub Keeps Coming Back
You fixed it. Ten miles down the road, it’s back. So, without further ado, let’s dive into the reasons nobody talks about upfront.
Loose Thru-Axle
This is the most common repeat offender — by a wide margin. A thru-axle torqued to 85 newton-meters instead of 110 feels completely solid by hand. Under braking load, though, the wheel shifts just slightly, and the rub returns. I’m apparently someone who under-torques axles instinctively, and a Topeak torque wrench works for me while “feel” never does. Side-step the error I made. Find the torque spec — it’s usually stamped on the fork crown or derailleur hanger — and use an actual torque wrench.
Contaminated or Unevenly Worn Pads
Brake fluid on the pad surface, road grime, chain lube overspray — any of it causes uneven braking pressure and intermittent contact. Wipe the pads down with isopropyl alcohol on a clean lint-free cloth. If one pad is noticeably more worn than the other, the caliper is still slightly off-center. Repeat the alignment process, more carefully this time.
Frame or Fork Flex Under Braking
Budget frames and entry-level forks flex laterally under hard braking. The caliper moves relative to the rotor. Rub returns. This is the worst version to diagnose — it only appears under load, never in the stand. Brake hard on a descent and listen. If the rub only shows up then, that’s flex. Your options are limited: note it, accept it as a frame characteristic, and talk to a mechanic if it becomes unbearable. It often signals that a stiffer fork would transform the whole bike.
When to Stop Adjusting and See a Mechanic
Not every rub is a DIY fix. Here’s where the line is.
A rotor bent more than 0.5mm — the thickness of a standard credit card — won’t respond to hand correction. It needs a truing stand. A wheel with a visible buckle or hop shifts position in the dropout even after perfect reinstallation, causing rub that comes and goes with no logic. That wheel needs rebuilding or replacement. A cracked dropout won’t hold a wheel steady under any circumstances. That’s a frame problem, full stop.
Rub that appears at only one specific point in the wheel rotation — not randomly, not constantly, but always at the same spot — often points to internal hub damage or a bent axle. Caliper centering won’t touch it.
Five-minute rule: if you’ve worked through every step above, the rub came back after your test ride, and you’ve already spent five minutes adjusting with no improvement — stop. The problem is structural. The shop has the tools. Take it there.

Leave a Reply