Road Bike Cassette Slipping — How to Fix It Fast
Road bike cassette slipping has started getting harder to follow with all the conflicting advice flying around. Replace the cassette, they say. Buy a new chain. Check your derailleur. Meanwhile you’re standing in your garage at 10 PM on a Wednesday, chain grease on your hands, completely stuck. As someone who wasted $47 on a brand-new Shimano 105 cassette only to discover my actual problem was a chain I’d ridden 4,200 miles past its replacement window, I sat down and learned this specific failure. Today, I will share it all with you.
Here’s the short version: cassette slip almost never means you need a new cassette. Something upstream is worn. Diagnosis first — at least if you want to stop buying parts that don’t fix anything.
Why Your Cassette Is Slipping
Three culprits. They stack in order of likelihood, and if you work through them wrong, you’ll spend $80 fixing the wrong thing.
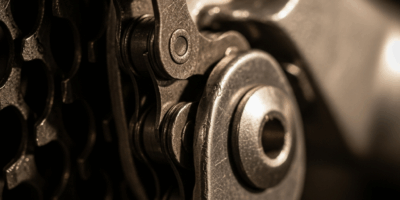
Most common is chain wear. Chains stretch — not in any way you’d notice by looking, but microscopically, over thousands of miles. Past 0.75% elongation, the pins no longer sit cleanly in the cassette teeth. Under load, especially climbing, the chain climbs the tooth slope and skips. New cassette installed on a worn chain? That cassette is destroyed in three weeks. Steer clear of where I went wrong.
Second is shark-finned cassette teeth. Fresh teeth stand nearly vertical — they’re shaped specifically to catch a chain under tension. Worn teeth hook forward at maybe 45 degrees, and the chain just rides up and over instead of biting. This usually shows up after 10,000 to 15,000 miles, faster if chain replacement got skipped.
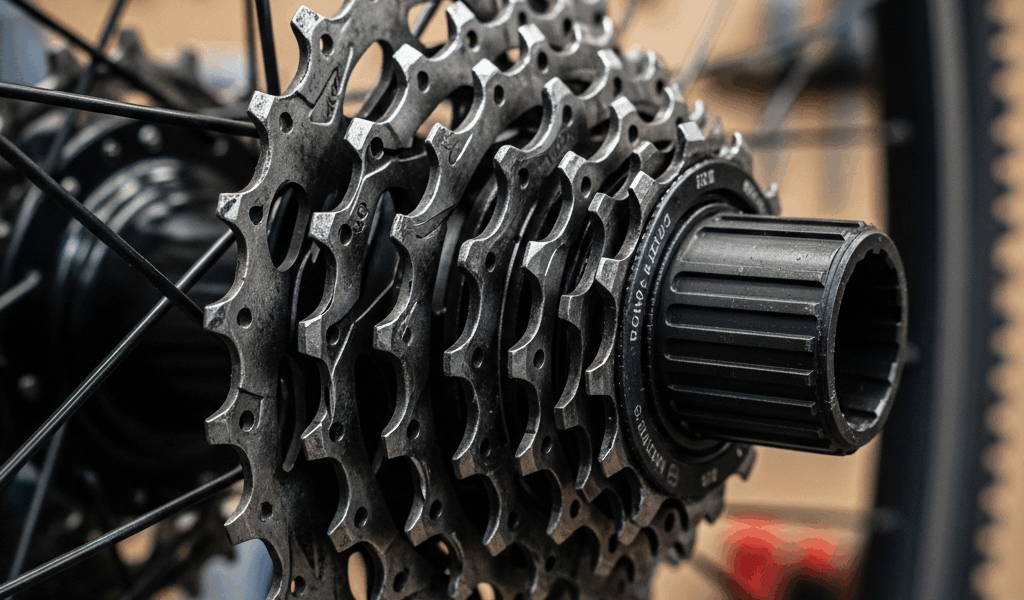
Third — least common, costs nothing to fix — is a loose cassette lockring. The lockring holds the entire cassette against the freehub body. When it works loose, the cassette shifts slightly under load. Whole thing moves a fraction of a millimeter. Enough to slip. That’s what makes this one endearing to us home mechanics — tightening a bolt might be your entire repair. So, without further ado, let’s dive in.
Check and Tighten the Cassette Lockring
Here’s the part worth saying first. It takes four minutes and costs nothing.
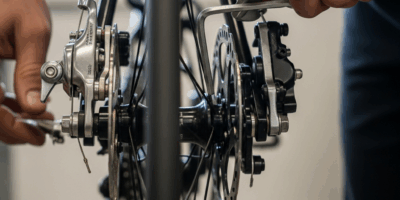
Remove the rear wheel. You’ll need a cassette lockring tool — Park Tool FR-5, about $13 at most shops — and a chain whip to keep the cassette from spinning while you work. The FR-5 fits Shimano and SRAM splines. Campagnolo uses a different pattern, so confirm your standard before ordering.
Seat the lockring tool into the splined center of the lockring. Loop the chain whip over two adjacent cogs and pull it away from you. Now turn the lockring tool clockwise — snug it down with moderate pressure. You’re feeling for resistance, not cranking like you’re angry at it. Target torque is around 40 Nm. Use a torque wrench if you have one. I’m apparently a chronic overtightener and the Park Tool TW-6.2 works for me while guessing never does — stripped an aluminum freehub body once doing it freehand. Not fun.
Reinstall the wheel. Shift through the cassette under light pedaling pressure. No slip? Done. Still slipping? Move on.
Check Chain Wear Before Anything Else
But what is chain wear, exactly? In essence, it’s elongation of the chain’s internal links caused by pin-to-plate friction over thousands of miles. But it’s much more than that — it’s the primary reason cassettes fail prematurely, and most riders never measure it.
While you won’t need a full workshop setup, you will need a chain wear indicator tool. The Park Tool CC-3.2 runs about $15 and takes literally three seconds to use. Two measurement notches — one at 0.5%, one at 0.75%. Slide it onto your chain while the bike is upright.
The 0.5% notch should drop in cleanly on a relatively fresh chain. If it does and the 0.75% notch doesn’t, you’re somewhere in acceptable territory — probably 4,000 to 7,000 miles depending on conditions. Cassette is likely fine. Move to teeth inspection.
The 0.75% notch is your hard stop. Slides in without resistance? Chain is gone. Order a replacement immediately — a KMC X11SL or Shimano CN-HG601 for 11-speed, around $25 to $35 depending on the retailer. And order a cassette while you’re at it, because a stretched chain accelerates cassette wear dramatically. Replacing just the chain onto a worn cassette causes the new chain to slip almost immediately.
No tool available? Pull the chain away from the smallest chainring at the front crankset. Fresh chain stays flush against the ring. Worn chain gaps away visibly — daylight between chain and teeth. Less precise than the CC-3.2, but workable for rough triage at 10 PM when the bike shop is closed.
Inspect the Cassette Teeth for Wear
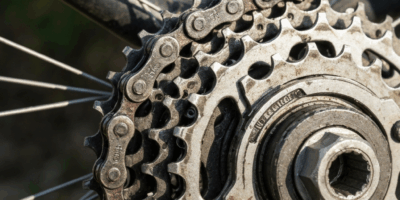
Worn cassette teeth look like shark fins. The leading edge tilts forward instead of standing vertical — it’s obvious once you know what you’re looking for. Fresh teeth have squared-off tips. Worn teeth hook aggressively forward, and a chain under load just rides straight up them.
Focus on your most-used cogs first — typically the 17t, 19t, and 21t sprockets on a road cassette. These absorb the majority of your pedaling effort and wear out well before the 11t or 28t that you rarely touch. Hold the wheel so light hits the teeth at an angle. Compare a middle cog to the 11t. The difference is immediate.
Run your fingernail along the tips of the teeth on the 17t and 19t. Fresh teeth feel like a continuous smooth edge. Worn teeth feel almost serrated — your nail catches on the forward hook with each tooth. Advanced wear is unmistakable this way, even in bad light.
First, you should replace both chain and cassette together — at least if the chain tested past 0.75% and the teeth show clear shark-fin profile. If teeth look clean and the chain is under 0.5%, replace nothing yet. Reassess in another 1,500 to 2,000 miles. A Shimano 105 R7000 11-speed cassette runs around $45 to $65 depending on tooth range, for reference.
When the Fix Does Not Hold
Lockring is tight. Chain wear is under 0.75%. Cassette teeth look fine. Still slipping. This scenario happens — and it points somewhere most people overlook entirely.
The freehub body. Inside that small cylindrical component are pawls — spring-loaded ratchet teeth that grip the hub shell as you pedal forward. Worn or gunked-up pawls don’t engage cleanly. The cassette slips relative to the hub itself, independent of any chain or cassette condition. It feels identical to cassette slip but the cause is completely different.
Frustrated by diagnostic dead ends, experienced mechanics developed the spin-back test using nothing fancier than their hands. Remove the rear wheel and spin the cassette forward by hand, then release. A healthy freehub coasts briefly and stops — one rotation, maybe less. A worn freehub spins backward multiple rotations as the pawls fail to catch. This new diagnostic approach took off several years later and eventually evolved into the standard quick-check that mechanics know and trust today.
Freehub might be the best option to replace here, as continued riding requires reliable pawl engagement. That is because worn pawls won’t self-correct — they degrade further under load. Confirm with a mechanic before ordering a hub, though. False positives happen, and a rear hub replacement with relacing runs $150 to $300 depending on the wheel.
Start with the lockring. Move to chain wear. End with cassette teeth. Nine times out of ten, one of those three things — a loose ring, a stretched chain, a shark-finned cog — is your entire problem. Work the sequence. Save the expensive parts for last.

Leave a Reply