Road Bike Front Derailleur Not Shifting Up Fix
Front derailleur troubleshooting has evolved with all the conflicting advice flying around. As someone who has spent an embarrassing number of Friday evenings hunched over a bike instead of actually riding it, I spent real time learning the ins and outs of this particular mechanical nightmare. Today, I will share it all with you.
The short version: it’s almost always one of three things. Slack cable tension. An H screw cranked in too far. Or a cage that’s dropped out of position. Most riders poke at random stuff and waste an hour. I’m giving you a decision tree instead — diagnose first, then fix only what’s actually broken.
Why the Front Derailleur Refuses to Shift to the Big Ring
Insufficient cable tension. The shift cable has gone slack — and this is the culprit roughly 70% of the time. Pull the lever and there simply isn’t enough force reaching the anchor bolt to drag the cage outward. You’ll see the cage twitch. Maybe move an inch. Never quite make it.
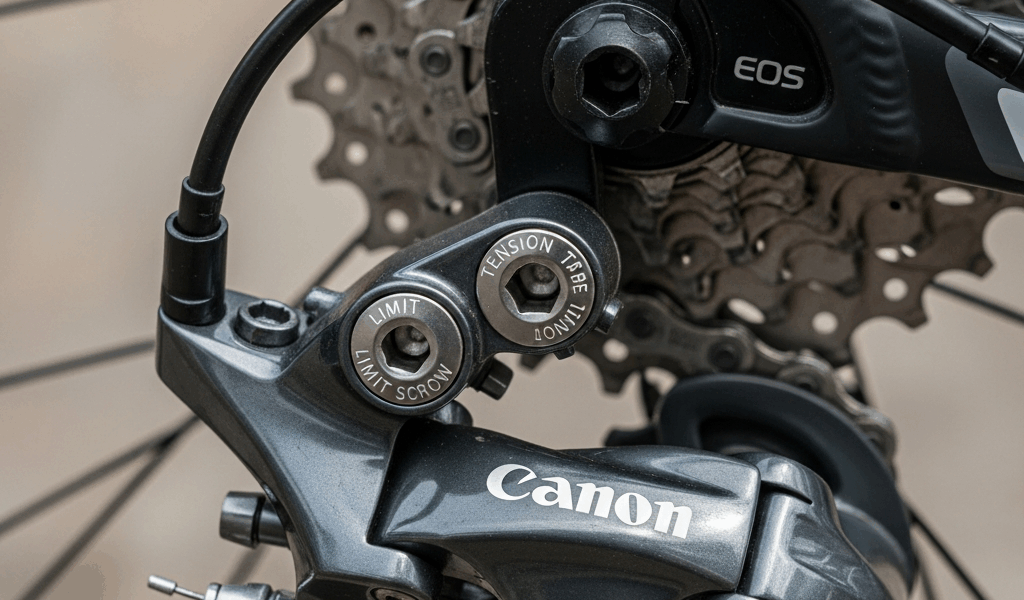
High-limit screw set too tight. But what is the H screw, exactly? In essence, it’s a mechanical stop that controls how far outward the cage can travel. But it’s much more than that — set it wrong and it becomes an invisible wall your cage slams into every single shift. You’ll see the cage move, then stop dead. Riders instinctively tighten the screw further, which makes everything worse.
Cage sitting too low or misaligned. A crashed bike, a dropped chain, or one unlucky pedal strike against a curb can push the cage down or rotate it out of parallel. When the geometry is off, the cage physically cannot push the chain up onto the big ring — even when cable tension and limit screws are dialed perfectly.
Check Cable Tension First — It Is Usually the Culprit
Worth mentioning before anything else. Cable tension is the easiest thing to verify and the most common reason this shift fails. I’ve watched riders swap out entire derailleurs — $60 to $80 gone — when two minutes with a barrel adjuster would have fixed it. Spare yourself the wrong turn I took.
Start on the small ring. Pull the lever toward big ring position — don’t click it, just apply steady pressure. Watch the cage. It should sweep outward smoothly and completely. Barely twitches? Moves halfway and stalls? Your cable is slack.
Find the barrel adjuster — that threaded collar on the derailleur body where the housing terminates. Grab it gently. There should be light tension on it, not a loose coil you can wiggle side to side. If it flops around, the cable has either stretched or worked loose at the anchor bolt.
Turn the barrel adjuster counterclockwise in half-turn increments. Test after each adjustment. The cage should swing outward with controlled, smooth motion. Stop when it reaches the big ring cleanly without overshooting into the crank arm. That’s the sweet spot.
If you’ve turned the barrel adjuster five full rotations and still have slack, the cable itself is done. Check where it enters the anchor bolt — fraying, kinking, visible corrosion, any compression at all. A new shift cable runs about $15 to $20 at most shops. Shimano cables, Jagwire, even basic house-brand stuff works fine here. Ten minutes to swap it out. A damaged cable won’t hold tension no matter how you adjust, so stop trying.
Adjusting the High-Limit Screw Without Losing Your Mind
So, without further ado, let’s dive in. Cable tension is sorted. Now look for the H screw — small Allen bolt or Phillips head, marked with an H on most derailleurs. Don’t touch the L screw. That one controls small ring stop and has nothing to do with your problem right now.
Position the bike so you can see the derailleur cage clearly from the right side. Look at the gap between the outer cage plate and the biggest chainring teeth. Correct clearance is 1 to 3 millimeters. No ruler handy? A standard credit card is roughly 0.76mm thick — stack two together and you’ve got a reasonable 1.5mm gauge sitting in your wallet right now.
Shift to the big ring. If the cage is pressing against the chainring or hanging too far inboard, the H screw is blocking full outward travel. Turn it counterclockwise in quarter-turn increments — not half turns, not full rotations. Quarter turns. After each one, shift back to the small ring and test the lever pull again.
One warning worth repeating: don’t open the H screw too far. Overshoot it and the chain launches outboard onto the crank arm. That produces a sound — loud, grinding, occasionally expensive — that you will immediately recognize as wrong. Conservative quarter turns every time.
Cage Height and Angle — the Fix Riders Overlook
That’s what makes front derailleur setup maddening to us road cyclists — you can have perfect cable tension and a correctly set H screw, and the thing still won’t shift because the cage dropped 6mm during a crash six months ago and nobody noticed.
I learned this after hitting a curb at roughly 18 mph. Spent forty minutes chasing cable tension before finally looking at the cage from straight ahead. It had dropped a quarter inch. The whole time I was adjusting the wrong thing entirely.
Correct cage height: the outer cage plate should sit 1 to 2 millimeters above the big ring teeth when positioned outward. Correct angle: outer cage plate runs parallel to the chainring face. Not toed in. Not toed out. Flat parallel — like two pages of a book lying closed.
Check it by standing directly beside the bike. Line your eye up with the chainring and outer cage plate. You’ll see instantly if something’s off.
If the cage is too low, loosen the derailleur clamp bolt — the one securing the derailleur to the seat tube — about a quarter turn. Not more. You want it moveable, not floppy. Slide the derailleur up until the outer plate sits 1 to 2mm above the big ring teeth. Tighten the clamp bolt. Check the angle again. Still not parallel? Loosen the clamp bolt once more, rotate the derailleur on the seat tube until it lines up, then tighten.
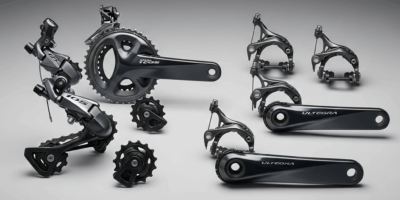
I’m apparently someone who always checks height but forgets angle — and that half-step of misalignment wrecked my shifts for two whole seasons before I figured it out. If the cage is visibly bent or crumpled from crash damage, no amount of repositioning fixes it. A bent cage flexes under load and the shift never completes cleanly. Replacement front derailleurs run $40 to $80 depending on groupset — Shimano Claris, Sora, Tiagra all land in that range.
When to Stop and Take It to a Shop
Some problems live well outside the scope of a barrel adjuster and a quarter-turn screw adjustment. Knowing when to quit is genuinely useful information.
Stop if the bottom bracket shell is cracked or shows flex under load. A compromised shell moves the chainrings around dynamically — no cable tension adjustment compensates for that. New frame or shell replacement. Shop job, full stop.
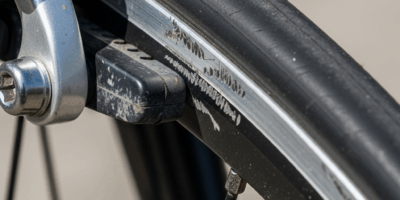
Stop if the cable housing is kinked or compressed inside the frame stop. Kinked housing restricts cable travel. The cable pulls, the housing absorbs the movement, the cage barely budges. The housing needs replacing — some riders handle this themselves, others don’t. If routing cable housing through frame stops sounds unpleasant, take it in.
Stop if the front derailleur mount is bent on a carbon frame. Carbon clamps crack under hard impacts. A bent mount won’t hold alignment regardless of how much you adjust around it, and forcing it typically damages the frame further. That’s a shop conversation, not a driveway fix.
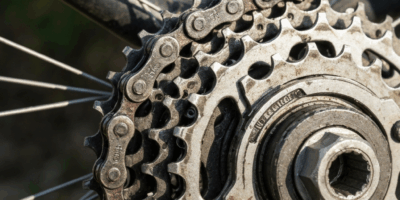
Stop if a chain wear checker reads past 0.75 and the chain skips under load during shift attempts. A stretched chain won’t seat cleanly on big ring teeth. Derailleur adjustment doesn’t fix chain wear. Replace the chain first — a decent Shimano or KMC chain runs $25 to $40 — then revisit the shifting.
Walking a bike into a shop isn’t failure. Sometimes the smart call is handing it to someone who has done this exact diagnosis fifty times that week and watching them sort it in fifteen minutes. That’s just honest self-assessment.

Leave a Reply