“`html
Is It Really Your Bottom Bracket—
The dreaded creak has gotten complicated with all the online theories flying around. You’re climbing out of the saddle, putting real power down, and something sounds like it’s about to snap. Your immediate thought is probably that your bottom bracket is dying, and you’re already calculating the cost of a new one at your local bike shop. I get it. I spent three weeks convinced my BB was shot before I realized the noise was coming from my saddle rails — at least if you want to know how embarrassing that conversation with the shop mechanic was.
Here’s the thing: road bike bottom bracket creaking assumes you actually know where the creak is coming from. You probably don’t. Not yet, anyway.
Before you spend $60 to $150 on a replacement, let’s isolate whether this is actually a BB problem. That’s what makes this diagnostic process endearing to most cyclists — it’s usually something simple.
The Out-of-Saddle Power Test
Stand up on the pedals and apply serious pressure. Not racing effort, but genuine climbing power — the kind where your legs are burning. Pay attention to whether the creak happens when you’re putting load through the crank, or if it’s coming from somewhere else entirely.
A true bottom bracket creak will happen in rhythm with your pedal stroke — usually on the downstroke when force is greatest. The sound originates from near the middle of the bike, between your legs, and has a distinct metallic or woody quality to it. That specificity matters.
The Pedal-Only Movement Test
Unclip one foot and let it hang. Slowly pedal with just one leg, keeping the bike steady against a wall or trainer. Does the creak follow that single pedal stroke? If yes, it’s likely in the crank arm, pedal, or BB itself.
Now repeat standing still — just moving the crank back and forth without pedaling. Rock the bike gently side to side. If you hear a creak during this static movement, you’re probably dealing with a loose saddle or seatpost rather than a BB issue. Different problem entirely.
The Body-Weight Test
Sit on the saddle and bounce gently. No pedaling. Just vertical movement. Creaking here almost always means your saddle clamp, seatpost, or seat tube is the culprit. I learned this one the embarrassing way after buying new pedals that weren’t the problem — spent $45 on Shimano SPD-SL pedals thinking they’d fix it.
Next, shift your weight side to side while seated. Rocking motions that produce creaks point to either loose pedals or — less commonly — a BB with actual play in it. That lateral movement is your diagnostic clue.
What Different Creaks Sound Like
A metallic click that happens once per pedal revolution is often a worn BB or loose crank arm. You’ll hear it clearly on downstrokes — not ambiguous at all.
A dull, woody squeak that seems to come from under you while seated usually means your saddle clamp needs tightening or your seatpost needs grease. Honestly, I hear this one more than any other creak.
A rhythmic, almost musical creak during out-of-saddle power can be a pedal, especially if you’ve clipped in. The pressure of your foot in the pedal can expose movement that isn’t there when you’re pedaling gently — something about the mechanics of it all.
Quick Fixes You Can Try First—
Probably should have opened with this section, honestly. Three fixes take less than ten minutes combined and solve roughly 60% of creak complaints. I’m apparently the type who goes expensive-solution-first, and I learn the hard way every time.
Tighten Your Crank Arms (2 minutes)
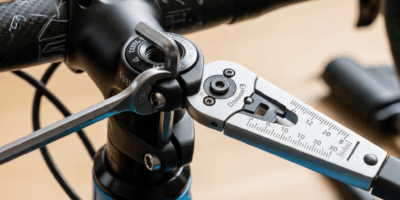
Crank arm bolts loosen naturally. Especially on rim-brake road bikes and bikes with older components — they just do. Grab a 5mm or 8mm Allen key — your specific bike manual will specify which one — and tighten both crank arm bolts firmly. Not gorilla-tight, but definitely snug.
Typical torque spec is 35–40 Nm if you have a torque wrench available. Without one, hand-tight plus one more hard turn usually works. Check these bolts every month if you’re riding regularly — don’t make my mistake of waiting six months.
Clean and Re-Grease Your Pedal Threads (5 minutes)
Pedal threads corrode. Water sits in there. Then the pedal rocks slightly in the crank arm and creates a creak you’ll swear is your BB — but it’s just oxidation.
Unscrew each pedal completely. Use a small wire brush or old toothbrush to clean the threads on both the pedal axle and inside the crank arm hole. Apply a thin layer of waterproof grease — I use Shimano Dura-Ace grease, but any decent bike grease works. Firm resistance when screwing back in means the threads are engaged properly.
Check Your Saddle Clamp (2 minutes)
Locate the bolt or lever that clamps your saddle to the seatpost. Tighten it. Most saddles need 5–7 Nm of torque. If you’re using a quick-release lever, it should feel firm when closed but shouldn’t require a hammer to lock.
Creaks from this area often go undiagnosed because riders assume saddle creaks are normal. They’re not. A properly clamped saddle is silent — you shouldn’t hear anything.
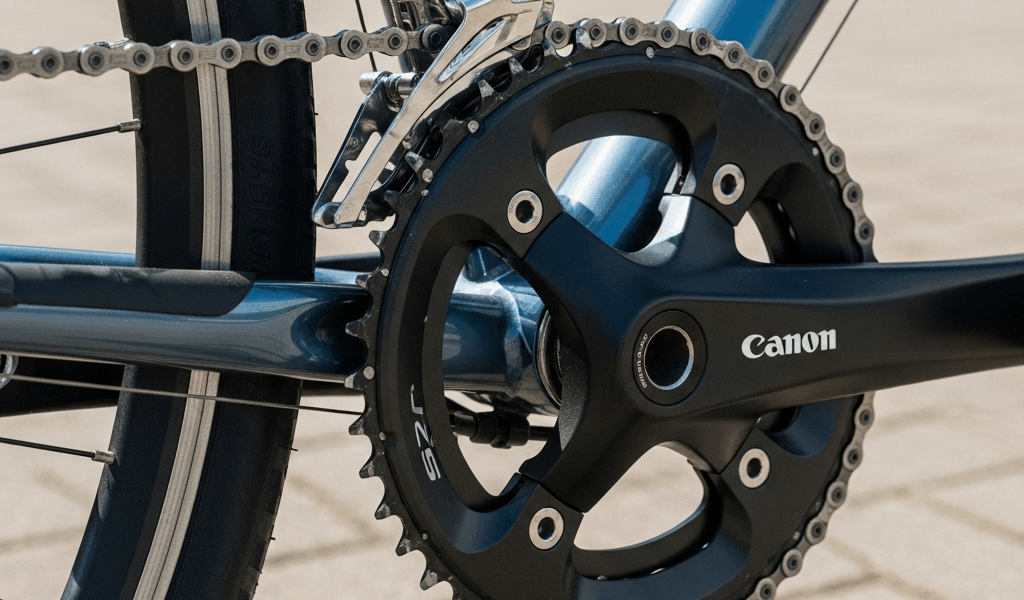
How to Access and Clean Your BB—
If the quick fixes didn’t work and your creak is definitely coming from the bottom bracket area, you have options. Full replacement is one. Cleaning and re-greasing your existing BB is another, and it works more often than people expect.
What You’ll Need
- Crank removal tool (Shimano TL-FC15 or equivalent for your crank type)
- Allen keys or wrench for crank arm bolts
- Grease — waterproof, bike-specific
- Small brush or pipe cleaner
- Clean rags
- Torque wrench (optional but recommended)
Removing Your Cranks
Start with the non-drive side — the left crank if you’re facing the bike. Loosen the crank arm bolt completely. Attach your crank removal tool and turn it clockwise until the crank slides off. Don’t force it. Repeat on the drive side.
Now you can see the BB shell — the cylindrical area where the crank axle sits. This is where water, dirt, and salt accumulate on road bikes. Probably should have mentioned that earlier.
Cleaning the BB Shell
Using a brush and rag, clean out any visible debris. Check if your BB has removable plastic cups or seals. Some do, some don’t — depends on your year and model. If it does, carefully pry them off and clean underneath. Wipe everything dry.
Look for rust or discoloration inside the BB shell. Surface rust can be cleaned away. Deep pitting or grinding sounds when you rotate the axle mean replacement is your only option.
Re-Greasing Contact Points
Apply a thin layer of fresh grease to the axle where it enters the BB shell, both sides. Rotate the crank by hand to work the grease in. Don’t overdo it — excess grease just collects dirt and defeats the purpose. You want a light protective layer.
Reinstall the plastic seals if they came off. Screw your cranks back on, hand-tight first, then use a torque wrench to tighten to 35–40 Nm for aluminum cranks, 50 Nm for heavier cranks.
When to Replace Your Bottom Bracket—
Cleaning helps when the BB itself is sound. Sometimes it’s not.
Signs that replacement is necessary: your crank arm moves laterally — side to side — even when bolts are tight, you feel grinding during the pedal stroke not just hear creaking, or the creak returns within days after cleaning and re-greasing. That last one’s the killer — it means the bearing surfaces are damaged.
A worn BB cartridge can’t be salvaged. Sealed cartridge bearings aren’t serviceable by design. You need a new one.
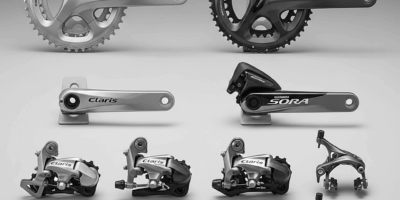
If this is your situation, your local bike shop can handle replacement in under an hour for $60–$150 depending on your crankset type and BB standard — BB30, PF30, external cup, threaded — there are many. This isn’t a job that requires shame or frustration. It’s maintenance.
Prevention for Next Time—
Road cycling in wet conditions means water finds every opening. Your BB shell is one of them.
Check your crank arm bolts monthly if you’re riding regularly. A loose bolt is always easier to fix than a worn BB. Re-tighten your saddle clamp and check pedal threads every two months. Light re-greasing of the BB contact points — without full removal — once a year keeps corrosion at bay.
During winter riding or wet conditions, hose off your drivetrain after rides but keep water away from the BB shell specifically. If water gets in, it will sit there until you clean it out. That’s been my biggest learning curve.
Your bottom bracket creak is fixable. Most of the time it’s not actually your BB. Start with diagnosis, work through the quick fixes, and only then decide whether you need parts or service. You’ll save time, money, and the frustration of replacing something that wasn’t broken.
“`

Leave a Reply