How to Tell If Your Handlebar Height Is the Problem
Road bike fit has started getting harder to follow with all the conflicting advice flying around. But honestly, most discomfort traces back to something simple — handlebar height. I spent two full seasons chasing a vague upper-back ache, trying new chamois shorts, different gloves, even a new saddle. Turned out my bars were the culprit the whole time. Not my fitness. Not my form. Just the bars.
So, without further ado, let’s dive in.
Here’s how you diagnose it. Bars too high? You’ll feel like you’re sitting in a recliner — weight dumped onto the saddle, hands barely touching the hoods, neck and shoulders absorbing everything your core should be handling. Climbs get punishing fast because your body fights the bike’s geometry instead of working with it.
Bars too low creates the exact opposite mess. Your neck cranes forward like you’re trying to read fine print. Shoulders creep up near your ears. Lower back rounds and gives out around mile 30. Your wrists take a beating from road vibration. The bar ends start to feel like the only livable grip position. You’re overextended — stretched too far into the cockpit with nowhere comfortable to go.
Here’s the part worth saying first. Most riders adjust by feel without ever naming what’s actually wrong. If either description sounds like your last three rides, the fix is probably a spacer stack adjustment. Simple. Reversible. Takes about 15 minutes in your driveway.
What Controls Handlebar Height on a Road Bike
Three things set your bar height: the spacer stack, the stem, and the steerer tube. That’s it.
Spacers are the small plastic or aluminum rings stacked on the steerer tube — the vertical tube running up from your fork into the frame’s head tube. Think of them like coins stacked above and below your stem clamp. Move spacers from below the stem to above it and your bars go up. Move them down and your bars follow. Most road bikes ship with spacers below the stem, leaving room to drop the position later once you’ve built flexibility and comfort with a more aggressive setup.
The stem clamps onto the steerer tube and holds your handlebars. Threadless stems — standard since the mid-1990s — lock down with a wedge mechanism and come in a range of angles: 6 degrees, 10 degrees, 17 degrees. A steeper angle points bars upward. A shallower angle runs them flatter. Don’t swap stems just to chase height, though — that’s what the spacers are for. Stem swaps affect reach, which is an entirely different problem.
Older threaded quill stems work differently. Height adjusts by how far you pull them out of the fork steerer, secured by a wedge bolt inside. If you’re riding a vintage road bike from before roughly 1995, that’s your system. Everyone else has threadless.
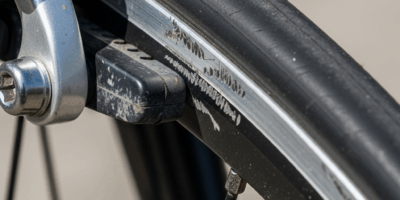
The steerer tube has a maximum insertion depth — usually marked with a engraved line or etching near the top. Never raise your bars above that line. Ever. Doing so means the stem clamp has nothing solid to grip, and your fork can slip or rotate mid-ride. That’s not a bad day. That’s a hospital visit.
How to Raise Your Handlebars Step by Step
While you won’t need a full tool kit, you will need a handful of basics. A 4mm or 5mm hex key handles most stem bolts — sometimes 6mm depending on the brand. A torque wrench is ideal. Most stem clamp bolts torque to 5–6 Newton-meters. Too loose and the stem rotates; too tight and you crack the steerer. I’m apparently a “tighten by feel” person, and a decent hex key with careful hands works fine — I used that method for years before finally buying a torque wrench for about $35 at a local bike shop.
Save yourself the trouble I had of skipping the torque wrench forever, though. Carbon steerers are unforgiving.
- Unscrew the top cap bolt — the center bolt on top of the stem, directly above the steerer tube. Two or three turns only. You’re releasing headset preload slightly, not yanking the whole thing apart.
- Loosen the stem clamp bolts on the sides of the stem. Two horizontal bolts. Loosen until the stem slides on the steerer with light hand pressure. Don’t remove them.
- Slide spacers from below the stem to above it. Start with one spacer — typically 5mm or 10mm tall. Slide it onto the steerer above the stem. Move one at a time and check the feel before committing to more.
- Re-tighten the stem clamp bolts evenly. Alternate side to side, a quarter turn at a time, so the stem doesn’t tilt. Tighten until snug, then check that the bars are straight and centered with the front wheel.
- Tighten the top cap bolt gently until you feel slight resistance, then another quarter turn. This resets headset preload — bearings should spin smoothly with zero play when you rock the bike forward and back.
- Test ride for 10 minutes. A parking lot works fine. Bars should feel locked in, steering smooth, no rattling or clunking from the headset area.
If your bars are already sitting at the steerer tube’s maximum line and still feel too low, spacers won’t save you. At that point, a stem with a steeper angle — 17 degrees instead of 10, say — or a riser stem is the path forward. Riser stems are less common on road bikes. Road geometry generally assumes a relatively low bar position, so specialty parts may require a shop order rather than an off-the-shelf grab.
How to Lower Your Handlebars Step by Step
Lowering follows the same process backward — but one detail trips people up every single time.
- Loosen the top cap and stem clamp bolts exactly as described above.
- Slide spacers from above the stem to below it. Move in 5mm or 10mm increments, whatever your stack allows. Small changes first — a 10mm drop feels dramatic on a road bike.
- Re-tighten the stem clamp bolts and top cap bolt using the same alternating method.
- Leave at least one spacer above the stem. This is where people go wrong. Even after relocating most spacers below, keep at least one — sometimes two — above the stem, sitting between the stem and the top cap. Those spacers preload the headset bearings correctly. Blogs that say “remove all top spacers” are wrong. Your headset will develop play, start rattling, and wear prematurely.
Steerer tube trimming is also an option — a shop cuts the excess steerer flush so the stem sits lower permanently. That was standard practice for custom fits around 2010 and still is for dialed-in setups. But it’s not a first attempt fix. Once the steerer is cut, you cannot raise the bars back. Leave trimming to a professional, and only after you’re completely certain of your final position over several months of riding.
When Handlebar Height Is Not the Real Issue
Sometimes spacer adjustments fix nothing. You move bars up 10mm, ride a week, and the discomfort just shifts location. That’s when reach enters the conversation.
But what is reach? In essence, it’s the horizontal distance between your saddle and your handlebars. But it’s much more than that — it interacts with bar height in ways that make isolated adjustments complicated. Low bars far away demand an aggressive, stretched posture. Low bars very close create cramping. High bars far away leave you reaching and hunched. High bars close put you too upright to generate power efficiently. Spacers only move bars vertically. Reach requires a different stem length — a bigger decision with real cost attached.
That’s what makes fit so maddening to cyclists chasing comfort. Nothing lives in isolation.
Saddle setback matters here too. A saddle pushed far rearward makes bars feel closer and higher relative to your body. Move the saddle forward and bars suddenly feel lower and farther away — without touching the stem at all. If spacer changes don’t resolve your discomfort after a genuine trial period, check your saddle position before ordering a new stem.
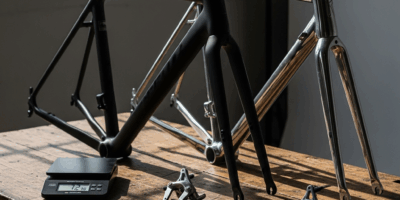
First, you should measure your current stem length — at least if you haven’t already. It’s usually stamped or printed on the side of the stem itself: 90mm, 100mm, 110mm. A longer stem extends reach. A shorter one brings bars closer. That’s the next troubleshooting step after spacers have been exhausted — not a first move, but a real one when nothing else is working.

Leave a Reply