
How to Tell If Your Saddle Is Actually Too High
Road bike saddle height has started getting harder to follow with all the conflicting advice flying around. So let me cut through it. You’re here because something feels wrong — and that instinct is probably right.
The clearest signal is hip rock. Film yourself from behind while pedaling, or prop your phone against something and watch the replay. If your hips are swaying side to side with each stroke, your saddle is too high. Full stop. Your body is rotating just to reach the pedal at the bottom of each revolution — and it shouldn’t have to do that. The stroke should feel like your legs are driving straight down, nothing else.
Next up: knee pain. Not sharp, stabbing pain. A dull, building ache — usually behind the kneecap or deep in the back of the knee — that starts around the 20-minute mark and lingers after you’ve stopped riding. That’s your patellar ligament and quad tendon absorbing load they were never supposed to hold alone. High saddle pulls the leg too far into extension. Something has to pay for that. Usually it’s your knee.
Then there’s what I call dead spots. At the bottom of your pedal stroke, the power transfer suddenly feels clunky — like the connection between your foot and the pedal just disappears for a split second. That’s your body telling you it’s too stretched to engage the calf and foot properly. The dead spot isn’t a fitness problem. It’s a geometry problem.
Worth flagging before going further. Most guides bury the symptoms and jump straight to measurement formulas. But if nothing hurts and nothing feels weird, lowering your saddle might actually break what’s already working fine.
The Quick Check Before You Touch Anything
Get a baseline first. The heel-on-pedal test is the industry standard — rough around the edges, but not wrong.
Clip into your pedals. Rotate one pedal down to the six o’clock position. Place your heel flat on that pedal. Your leg should be almost straight — not locked, almost straight. Knee bending noticeably means the saddle is too high. Heel lifting off the pedal means it’s too low. Simple enough.
Here’s the catch, though. This test assumes your cleats are correctly positioned and that your leg proportions match some statistical average. They probably don’t. Use it as a confirmation tool, not gospel.
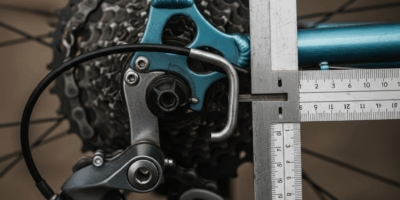
Cross-reference with the 109% inseam formula. Measure your inseam in centimeters — bare feet, standing against a wall, inside leg. Multiply by 1.09. That number is your target saddle height, measured from the center of the bottom bracket to the top of the saddle. A basic tape measure works fine. A Park Tool PRS-25 if you want to feel official about it. Write the number down before you change anything. Seriously, write it down — on the tape you’re about to put on your seatpost, if nothing else.
If the heel-drop test and the formula are pointing in different directions, you’ve found exactly where the friction is. Note it. We’ll come back.
How to Lower Your Saddle Height Step by Step
You need an Allen wrench — probably a 4mm or 5mm depending on your seatpost clamp. Some bikes use a quick-release lever instead. Either way, get yourself to a position where you can move the saddle without the whole post dropping out.
- Loosen the seatpost clamp. Not all the way — just loose enough that the saddle tilts slightly under light hand pressure.
- Drop the saddle 2 to 3 millimeters. Not half an inch. Millimeters. This is where most people self-destruct — they drop the saddle a full centimeter, ride once, feel weird, and spend the next six weeks chasing the right height. Skip the misstep I made.
- Re-tighten the clamp. Carbon seatposts need around 5 Nm — easy to crack if you go heavy-handed. Alloy handles 6 to 8 Nm without complaint. No torque wrench? Tighten until snug and stop. You’re not building an engine block.
- Mark your original position before you ride. Electrical tape around the seatpost, a line with a Sharpie — whatever sticks. If this adjustment doesn’t fix things, you need to know exactly where you started.
Lowering takes patience. Each millimeter changes how your entire leg engages through the pedal stroke. Rush it and you’ll overshoot — end up too low, which brings its own miserable set of problems: front knee pain, power loss, hamstrings that feel like guitar strings.
Test Ride and Fine-Tune
Find a flat road. Not a climb, not an interval session — just a flat stretch of pavement and a steady, moderate pace. Spin for at least 15 minutes. That’s the minimum your body needs before it starts signaling what’s working and what isn’t.
A correct pedal stroke feels almost invisible. Slight knee bend at the bottom. Knee stays put at the top. Hips completely still. Power flowing evenly through all 360 degrees with no dead patches, no compensation, no weird lurching. When it’s right, you stop thinking about it — which is exactly how it should feel.
Hip rock gone? Good. Keep that adjustment. Knee ache easing up? Stay the course. Still getting dead spots through the bottom quarter of the stroke? Drop another 2 to 3 millimeters and test again.
But there’s a threshold here. Two small drops, symptoms still present — your saddle height probably isn’t the real culprit. Go back to your original position. Reference that tape mark. Something else is going on.
When the Saddle Height Is Not the Real Problem
Cleat position matters more than most riders ever realize. If your cleats are sitting too far forward on the shoe, knee tracking goes sideways even with a perfectly dialed saddle height. You’ll feel it on the inside of the knee, or notice a sensation like your foot is caving inward through the bottom of the stroke. That’s not a saddle issue — that’s mechanics. Different fix entirely.
Saddle tilt is another phantom culprit. A nose-down tilt effectively raises your seat height, pushing you forward and up without you realizing it’s happened. Nose-up tilt does the opposite. I’m apparently sensitive to even slight tilt changes — a 3-degree nose-down works for me while anything flatter never felt right — so grab a small spirit level and check before you assume the height is wrong. Level it. Ride it. Then reassess.
A professional bike fit makes sense if you’ve self-diagnosed and still can’t pin it down — especially if you’re new to the bike, recently changed weight significantly, or genuinely can’t tell whether the pain is coming from the saddle, the cleats, or the bars. A good fitter uses a plumb line, video analysis, and your actual movement patterns to dial everything simultaneously. Budget somewhere between $150 and $300 depending on your area and what the session includes. Worth it if you’ve been chasing the same problem for months.
But start with symptoms. Start with small changes. Start with that tape mark on your seatpost. The fix is fast — not because there’s some secret formula, but because your body has already been telling you exactly what’s wrong. You just needed to know how to listen.

Leave a Reply