“`html
How to Diagnose Brake Pad Rub vs Other Brake Issues
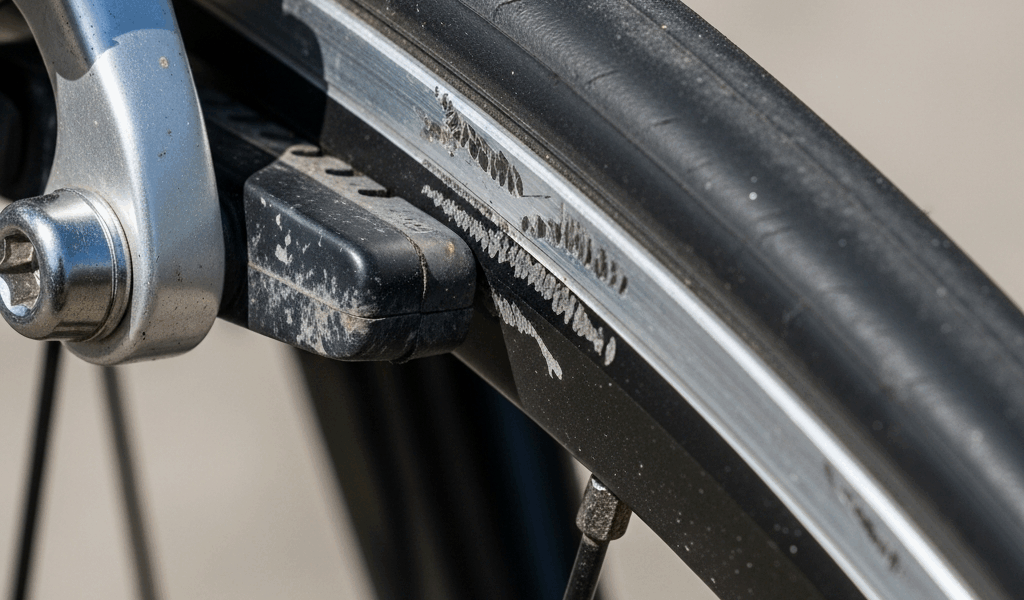
Road bike brake pads rubbing on rim—this is probably the most annoying mechanical issue I encounter, and I’ve dealt with it myself more times than I’d like to admit. The sound is unmistakable: a rhythmic whisper or occasional scrape as your wheel turns, even though your brakes aren’t engaged. Before you start adjusting anything, you need to actually confirm what you’re hearing.
Try the 30-second test. Lift your bike or flip it upside down so the wheels spin freely. Spin the wheel by hand and listen carefully. Real brake rub has a specific quality — it’s a consistent scraping sound that happens at the same point in each rotation, not a random creaking or squeaking from other components. You’ll hear it clearly, usually audible every time the wheel completes a rotation if it’s truly pad-to-rim contact.
Here’s where things get interesting: intermittent rub often means heat-related expansion, while constant rub indicates misalignment. On a hot day after hard riding, your rim expands slightly. If your pads are already close, thermal growth pushes them against the braking surface. That’s different from a caliper that’s permanently offset — way different, actually.
Spin the wheel and watch the brake pads from the side while it rotates. You’re looking for visible contact — any moment where the pad surface touches the rim. Even a tiny gap (1mm or less) can cause rub under load. Cable stretch doesn’t cause rub, though. People get this wrong constantly. Stretched cables simply reduce braking power and engagement. They don’t push your pads sideways into the rim.
Check Brake Pad Wear Before Adjusting
Probably should have opened with this section, honestly, because I’ve adjusted countless brakes unnecessarily when the real problem was simple pad replacement. Worn pads are thinner and sit deeper in the caliper body, which changes their angle and can create rub where new pads wouldn’t.
Measure your pad thickness from the friction material to the back of the pad backing plate. New rim brake pads run 4–5mm thick. Once they drop below 3mm, you’re in the danger zone. A small ruler, digital caliper, or even a piece of folded paper works as a thickness reference. Most quality rim brake pads cost $15–$35 per set, so this is a cheap diagnostic step that saves hours of troubleshooting.
Look at the pads themselves. If they’re glazed (shiny, compressed-looking surface instead of textured), contaminated with road grime and oil, or visibly compressed into a thin wafer, replacement is your answer. Worn pads have less friction material, so they’re both less effective and more prone to alignment issues.
Check the brake pad manufacturer specifications too. Shimano pads, SRAM pads, and generic third-party pads all have slightly different geometry. Mix brands or generations, and rub appears even with perfect caliper alignment. This happened to me when I grabbed some no-name pads at a bike shop — they had thinner backing plates and rubbed constantly against my Shimano calipers.
If your pads measure under 3mm, replace them first. Spin the wheel again before you do anything else. That rub might vanish completely. You’ve just saved yourself the frustration of micro-adjusting a brake system when the parts were simply worn out.
Center Your Brake Caliper Step by Step
Most brake rub happens because your caliper isn’t centered on the rim. One pad sits closer than the other. This is the most common fix, and it works about 70 percent of the time in my experience.
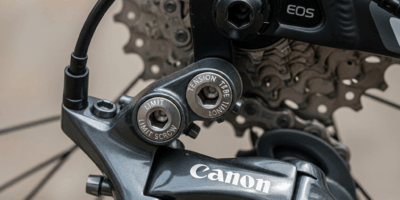
Locate the centering adjustment screw on your brake caliper. On Shimano rim brakes, it’s usually a small hex screw — typically 2mm or 2.5mm — positioned on one side of the caliper body, roughly perpendicular to the brake arms. SRAM and other brands have similar setups but the exact location varies. Consult your brake manual if you’re unsure. Manufacturer diagrams exist online for nearly every caliper model.
Loosen your brake cable at the anchor bolt. This is the bolt that holds the cable housing to the caliper. You want roughly 2–3mm of movement before re-tightening. With the cable loose, the brake arms spring outward to their resting position, and the caliper becomes easier to center.
Now spin your wheel and observe which pad sits closer to the rim. Let’s say the left pad rubs. You’ll turn the centering screw clockwise (on most calipers) to push the left arm away and pull the right arm inward. Go small — quarter-turn adjustments only. Spin the wheel. Check clearance. Adjust again if needed.
Once you achieve even clearance on both sides (roughly 1–1.5mm gap between pad and rim on each side), hold the caliper body in position and re-tighten the cable anchor bolt to your brake’s specified tension. Shimano generally prefers 6–8 Nm here, though you’re mainly looking for snug without overtightening and cracking the caliper.
Spin the wheel one more time and confirm the clearance is still even. Re-tensioning doesn’t always create problems, but it can shift the caliper slightly. This final spin is your verification step, and skipping it costs people brake adjustments that don’t actually last.
Adjust Pad Angle and Spring Tension If Rub Persists
If centering and pad replacement didn’t solve it, consider pad toe-in. This is advanced, but it’s worth understanding. Toe-in means the front of the pad — the leading edge as the wheel rotates — contacts the rim slightly before the rear of the pad. That’s actually desirable for noise reduction and braking feel. Most quality calipers come with slight toe-in built in, but it can shift over time.
Your pads might have adjustable backing plates or shims that let you tilt them slightly. Again, your specific brake manual matters because this varies significantly by model. Some calipers have a small set screw that adjusts the angle of the entire pad assembly.
Spring tension screws affect how aggressively the pads return to their open position after braking. If your spring tension is too weak, the pads creep toward the rim and eventually contact it. These screws — usually small hex bolts on the caliper body — can be tightened slightly to increase return force. A quarter-turn at a time is your safe adjustment pace.
If you’ve checked pad wear, centered the caliper, and verified rim trueness (the rim shouldn’t wobble side to side), and rub still persists, your issue might be cable housings that have shifted, a bent caliper arm, or worn brake pivot points. These are repair territory rather than adjustment territory.
Prevent Brake Rub During Routine Maintenance
I’ve learned that brake rub prevention beats brake rub repair every single time. Caught early, routine maintenance keeps your brakes quiet and effective. A small rub now beats a dead brake mid-ride on a descent, and that’s the mindset that keeps your bike running smoothly.
Cable stretch happens naturally over time. Road spray, sweat, and simple flexing cause your brake cable to elongate micro-fractions of a millimeter. Over a year, this adds up. An annual brake inspection should include checking cable tension and adjusting your brake reach if needed. That’s a 10-minute job that prevents months of creeping rub.
Pad contamination from road grime, brake fluid residue, and dust creates a layer that changes how pads interact with your rim. Wipe down your brake pads and rims monthly if you ride frequently. Use a clean rag and some rubbing alcohol. It’s not glamorous, but it extends pad life and reduces noise and drag.
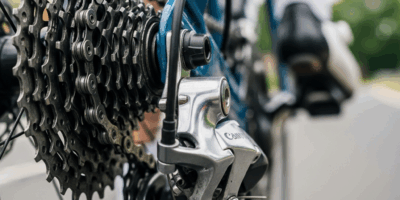
Wheel trueness matters more than many riders realize. A rim that’s out of true by 2–3mm will rub even with a perfectly centered caliper. Grab your wheel and spin it near your brake pads, or use a truing stand if you have one. If you see visible side-to-side wobble, your rim needs truing or replacement. This is usually a job for a bike shop unless you own a truing stand and know how to use it.
Establish a rhythm. Check your brake pads every 500 miles of riding. Inspect caliper centering visually every month. Listen for changes in brake feel or sound — those early warnings let you adjust before problems develop. I aim for a quick brake inspection twice yearly, with a deeper dive annually. Your bike will reward you with consistent, quiet, powerful braking that doesn’t ruin your rides with mysterious noises.
“`

Leave a Reply