Road Bike Seat Post Slipping Down — How to Tighten
Road bike seat post slipping has gotten complicated with all the misconceptions flying around. I discovered this the hard way during a 40-mile ride last summer when my saddle crept down nearly an inch over two hours, forcing me to stand more than I’d planned and destroying my power output. The worst part? I’d already owned the bike for three years and didn’t realize the clamp mechanism was even loose. Most riders confuse seat post slippage with saddle height adjustment issues or assume they need a new component when the fix is actually straightforward.
But what is seat post slippage? In essence, it’s when your saddle drops relative to your frame. But it’s much more than that — it’s a safety problem. A dropping saddle changes your geometry mid-ride, throwing off your balance and forcing you into positions you didn’t plan for. I’ve seen riders assume their saddle needs replacing or their frame is damaged when they actually just need to understand how their clamp works and apply the right amount of tension.
How to Tell If Your Seat Post Is Actually Slipping
Before you start tightening anything, you need to know what’s actually happening. Seat post slippage, saddle creep, and rail clamp failure are three different problems that riders lump together. Probably should have opened with this section, honestly — I wasted half an hour once trying to tighten a saddle that was rotating on its rails instead of slipping down the post itself.
Saddle creep happens when your saddle rotates forward or backward on the rails while the post stays put. You’ll notice the saddle nose dips or rises. Rail clamp failure occurs when the saddle shifts side-to-side because the clamp bolts that grip the rails have come loose. Post slippage is the full saddle and seat post dropping down relative to your frame — the problem this article addresses. That’s what makes post slippage endearing to no one, honestly.
Run this diagnostic test: tighten your saddle rails completely, then use a marker or tape to make a horizontal line across the seat post and seat tube junction. Ride for 20 minutes at normal intensity, including some standing efforts to increase vibration. When you return, check if the mark has moved downward. If it has, you have genuine post slippage.
You’ll also notice slippage while simply adjusting the bike. Push down on the saddle with moderate pressure — does it compress smoothly, or does it feel firm with slight resistance? A properly clamped post should feel immovable. Saddle sinks easily? Your clamp isn’t doing its job.
Check Your Clamp Type Before You Tighten
This is where most riders go wrong. Seat post clamps come in two basic designs, and they tighten differently. Using the wrong torque or sequence on the wrong design will either leave your post slipping or over-tighten it into the post, potentially cracking your seat tube. So, without further ado, let’s dive in.
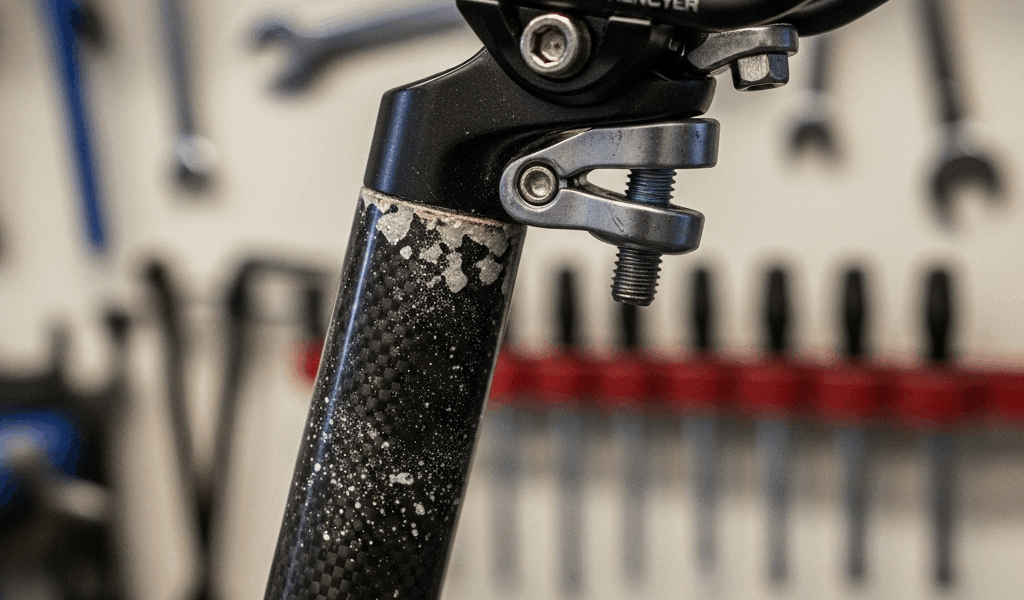
Single-bolt micro-adjust clamps are the Shimano style you’ll find on most modern road bikes under $1,500. They have one bolt on top that tightens a cam mechanism, pulling a narrow band around the post. The bolt usually sits at a 45-degree angle or perpendicular to the frame tube. These are elegant and lightweight but weaker than their alternatives. Identify yours by looking for a single vertical or angled bolt with an Allen key socket, typically sized 4mm or 5mm.
Two-bolt full-circumference clamps use two bolts positioned on opposite sides of the post, each drawing down a separate lug to clamp around the entire circumference. These are stronger and more resistant to slippage because they distribute pressure evenly. You’ll find them on higher-end bikes, vintage steel bikes, and most gravel and mountain bikes. They’re also much heavier.
Some bikes use a hybrid design with one larger bolt and one smaller adjustment bolt — these behave like full-circumference clamps once fully tightened.
Identifying your clamp takes 30 seconds. Crouch behind the saddle and look at the seat tube directly under where it emerges from the seat cluster. How many bolts do you see? One? Two? That’s your answer. Seriously, it’s that simple.
Step-by-Step Tightening Process
Seat post clamps typically require between 5 and 9 Newton-meters of torque. That’s not much — about the effort you’d use to tighten a jar lid, not strip a bolt. You won’t need a torque wrench, though having one helps, at least if you want precision.
For single-bolt micro-adjust clamps: Start with your Allen key loose. Position it so the slot aligns with the frame direction for access. Turn clockwise slowly, feeling for resistance. After 2-3 full rotations, you’ll start feeling friction increase. Keep turning until the saddle stops moving under firm hand pressure — this usually happens around 5-7 Nm. You’ll hear a subtle creaking sound as the cam tightens the band around the post. That’s normal. Stop when the resistance becomes pronounced, not when you feel significant mechanical resistance. This usually takes an additional 1-2 rotations past first significant resistance.
For two-bolt full-circumference clamps: This requires sequence discipline. Tighten the bolt on the non-drive side first (left side when looking at the bike from behind) with about 2-3 Nm of torque. Now tighten the drive-side bolt to the same tension. Alternate back to the first bolt, then the second, using slightly more pressure on each pass. After three alternating passes, both bolts should be at 4-5 Nm each. This prevents one side from binding before the other side engages, which can crack the seat tube or permanently deform the clamp.
What “tight enough” feels like: You should not be able to move the saddle downward with hand pressure, even with moderate force. You should also be able to twist the saddle slightly if you grab it and the seat tube simultaneously and rotate — this confirms you haven’t over-clamped. If you strip the bolt or crack the seat tube, you’ve gone too far. The sweet spot is immobility without violence.
When Tightening Alone Won’t Work
Some bikes just won’t stay clamped no matter how much you tighten. Material mismatches cause this most often — frustrated by an aluminum seat post slipping in a carbon fiber seat tube, I learned the hard way that smooth material surfaces don’t grip each other. Carbon posts in aluminum frames do the same thing. The friction compatibility just isn’t there.
Scratches and corrosion also reduce friction. If your post is scratched or your clamp shows rust or anodizing damage, the surfaces won’t hold tension properly. Light surface preparation helps — mild sandpaper or a Scotch-Brite pad can restore just enough texture for friction.
This is where threadlocker enters. Not the permanent red Loctite 271 — use low-strength blue Loctite 243 instead. Apply a thin line around the circumference of the post where it enters the clamp, or on the clamp bolt threads, then insert and tighten normally. Let it cure for 24 hours before riding. This adds friction through chemistry rather than pressure alone. The blue formula breaks apart with normal Allen keys and won’t permanently bond.
Grease? Wrong move. I’m apparently someone who overthinks these things and used grease once, thinking it would help tightening — it doesn’t. Grease between post and clamp actually worsens slippage. Use grease only on the lower post (below the clamp) to prevent corrosion, never in the clamp zone itself.
Maintenance to Prevent Future Slippage
Vibration and sweat are your enemies. Road vibration constantly micro-loosens bolts, while sweat from your hands and rain exposure corrodes the contact surfaces between post and clamp. Establishing a tightening schedule prevents creep from becoming a problem.
Check your clamp tension every four weeks during regular season if you ride three or more times per week. First, you should loosen the bolt slightly — at least if you want to reset the tension properly — then re-tighten following the process above. This doesn’t take more than two minutes and prevents the issue from developing.
After wet rides, dry the seat tube and clamp area with a towel. Don’t let water sit in the clamp interface. Salt from sweat is particularly corrosive — a quick freshwater rinse followed by drying makes a difference. That was how I solved my corrosion problem back in 2019.
Inspect your post for scratches or damage annually. If you’re seeing visible damage to the clamped surface, light sanding with 320-grit or higher sandpaper restores just enough grip. This sounds extreme, but addressing it now prevents slippage problems three months from now. Don’t make my mistake of waiting until your saddle is nearly on the seat tube.
Don’t over-tighten hoping it’ll solve future loosening. The seat tube can only handle so much pressure before the wall thickness gives way. Cracks develop silently and destroy the frame. Stay within the 5-9 Nm window. Might be the best option, as frame integrity requires respect, and that’s because a cracked seat tube means a totaled bike.
If slippage persists after proper tightening and you’ve ruled out a clamp design issue, consider a clamp upgrade. A two-bolt design will almost certainly solve the problem compared to a micro-adjust single-bolt clamp. This costs $30-60 and takes 10 minutes to swap.


Leave a Reply