“`html
Why Your Chain Rubs and Where It Matters
Road bike chain rubbing on front derailleur happens for exactly three reasons. Not four. Not “it’s complicated.” Three. I’ve spent the last eight years wrenching on bikes, and I can tell you that most riders waste hours chasing phantom adjustments because they haven’t pinpointed which of these three problems they’re actually dealing with.
The outer cage rubs. The inner cage rubs. The chainring is worn flat. Those are your suspects.
Here’s what matters: outer cage rubbing happens when you’re on your big ring and your largest cog—the cross-chain position nobody talks about but everyone uses. That’s where the derailleur cage drifts outward and touches the chain. Inner cage rubbing, on the other hand, shows up when you’re on your small ring and small cog, or sometimes across the middle gears. That’s a cable tension problem almost always.
Chainring wear is the sneaky one. Probably should have opened with this section, honestly. Worn teeth create a laterally unstable chain, and no derailleur adjustment fixes that. The chain moves side to side because it has nothing solid to sit on.
Recognizing which type of rubbing you have saves you from disassembling your entire drivetrain. I once spent 45 minutes adjusting limit screws when I actually needed to replace a $40 chainring. Frustrating, but the diagnostic approach prevents that.
Check Your Chainring First Before Touching The Derailleur
Stop. Before you adjust anything, inspect the chainring.
Look at the teeth from the side. Worn chainring teeth slope backward—they lean toward the cassette instead of standing perpendicular to the crankarm. A new chainring tooth is symmetrical. A worn one looks like a shark’s fin. If you see that, the chainring is done.
Run your finger across the tops of the teeth. A worn chainring feels rough and hook-shaped at the tip. New teeth feel relatively square. This isn’t metaphorical—the chain sits differently on worn versus new teeth, and it’ll always rub regardless of derailleur position.
Now check for side-to-side wobble. Put your bike in a stand so the crankset hangs freely. Spin the crank slowly and watch the big ring from the side. If it visibly rocks left and right, that’s either a bent crank arm (separate problem, take it to a shop) or chainring damage (also take it to a shop—this one’s about bent teeth or a cracked spider).
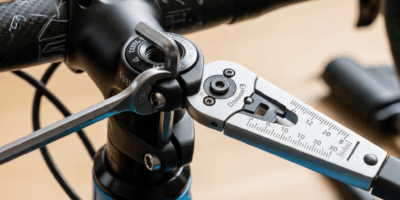
The runout check works like this: place a ruler or straightedge against the chainring teeth while spinning slowly. If the gap between the ruler and teeth changes as you rotate, the ring’s bent. Quarter-inch of variation is normal. Half-inch means replacement.
Bent cranksets and severely worn chainrings won’t respond to derailleur tweaks. You’ll adjust, it’ll stop rubbing in one gear, then return in another. Chasing ghosts. If your chainring shows any of these signs, replace it and don’t waste time on derailleur work.
Using Trim Positions to Stop Rubbing Without Full Adjustment
Most front derailleur rubbing stops with trim. Not a full limit screw adjustment. Trim.
Your brake levers have tiny detents. On Shimano or SRAM systems, you can shift the front derailleur slightly left or right without actually changing rings. That’s trim. It moves the cage a few millimeters—usually enough to clear chain noise when you’re in cross-chain positions.
On SRAM hoods, trim is a short press of the lever inward. On Shimano mechanical, it’s a partial press that doesn’t lock into the next gear. You feel the difference immediately—the cage moves, the chain clears, no actual shift happens.
This matters because trim solves 70% of rubbing problems without touching any bolts. Your small-ring-to-large-cog combo feels tight? Trim inward. Big-ring-to-small-cog feels close? Trim outward. One or two millimeters of movement is often all you need.
Why recommend this first? Because once you adjust limit screws, you’ve changed the baseline. Trim works within the derailleur’s existing range. It’s reversible. It takes three seconds. And it teaches you whether the real problem is cage position or something else entirely.
If you trim and still hear rubbing, then you know the cage position itself is wrong and needs adjustment. If trim fixes it, you’re done. That diagnostic distinction matters.
Step-by-Step Outer Cage Adjustment If Trim Doesn’t Work
Assume trim didn’t work. The outer cage still rubs on your big ring and large cog. Now adjust the high-limit screw.
Shift into the big ring and big cog—the exact gear where you hear rubbing. Listen carefully. Is it a light tick-tick-tick or heavy grinding? Light means barely misaligned. Heavy means the cage is way out.
Locate your high-limit (H) screw. It’s the one closer to the frame, marked with an “H” on quality derailleurs. On a Shimano 105 or SRAM Rival, it’s usually a 3mm Allen bolt on the back face of the derailleur.
Turn the screw one quarter turn clockwise. That’s roughly 90 degrees. Don’t crank it. Quarter turns.
Shift into the problematic gear combination. Test. Does it rub less? If yes, test another quarter turn. If no rubbing at all, stop. If it still rubs heavily, turn another quarter turn.
Most outer cage rubbing clears within one full turn of the H screw. More than that suggests either severe misalignment (possibly from impact damage—go to a shop) or the wrong diagnosis entirely.
Once it clears, test the entire cassette on your big ring. Make sure you haven’t overadjusted and created a gap that makes shifting sluggish. The cage should be maybe 1mm away from the chain at the closest point.
When Cable Tension Is The Real Problem
Inner cage rubbing—the kind that happens on your small ring, usually with middle gears or your small cog—lives inside the cable tension universe.
The front derailleur pulls inward via a cable attached to your shifter. If that cable has gone slack, the derailleur sits too far outward. The inner cage, instead of being tucked safely away, touches the chain as it moves toward smaller cogs.
Grab your bike and shift to the small ring and middle of your cassette. Spin the cranks and listen. Rubbing from the inner cage sounds different from outer cage rubbing—it’s usually quieter, more of a grinding sensation you feel than hear.
Locate the barrel adjuster where your derailleur cable meets the shift lever or derailleur body (most road bikes have it at the derailleur). It’s a cylindrical collar that threads on or off the cable housing.
Turn the barrel adjuster counterclockwise a quarter turn. This adds tension. Test that same small-ring, middle-cog position.
Still rubbing? Go another quarter turn. Most cable-slack rubbing clears within one full turn of barrel adjustment.
Here’s the critical part: after adjusting the barrel, test your small ring and small cog position. If the chain has trouble shifting to the big ring, you’ve added too much tension. Dial it back slightly. Cable adjustments live in the balance zone—tight enough to position the cage, loose enough to shift cleanly.
Unlike limit screw adjustments, barrel adjustments are reversible and can be made mid-ride. Tighten a quarter turn. Jam your derailleur into the small ring. Too tight now? Loosen a quarter turn. This is tuning, not surgery.
Signs You Should Stop And Take It To A Shop
Some rubbing situations sit outside DIY territory. Respect your limits.
If your derailleur hanger is bent—the small metal tab that the derailleur bolts to—you can’t adjust your way out. It looks straight to the eye, but even 2mm of bend creates cascading problems. A derailleur hanger alignment tool costs $200 to $400. One trip to a shop costs $40 to $60 and they’ll identify the issue immediately.
If your cable is frayed, kinked, or visibly damaged, replace it. You can’t adjust your way around mechanical failure. Same with housing that’s cracked or separating.
If your chainring has multiple bent teeth or a cracked spider (the arms connecting the big ring to the crank), stop. Those replacements involve tools and knowledge outside basic home repair.
If rubbing persists after trying trim, outer cage adjustment, and cable tension work, and your chainring and hanger look clean, something else is wrong. Maybe the derailleur itself is bent. Maybe your crankset has play. Maybe something shifted during a crash you didn’t think was serious. A shop diagnostic takes 15 minutes.
Knowing when to stop prevents you from damaging something else while chasing a phantom fix. That’s not defeat. That’s smart wrenching.
“`

Leave a Reply