“`html
Road Bike Drivetrain Making Noise While Pedaling — A Diagnostic Approach
My road bike started producing this awful clicking sound during my commute last spring. I ignored it for two weeks. Big mistake. By the time I actually stopped to diagnose what was happening, the noise had evolved from occasional to constant, and I’d created additional wear on components that could have been easily fixed with a $15 chain cleaning.
Road bike drivetrain noise while pedaling has gotten complicated with all the catastrophizing flying around. The real challenge isn’t fixing it—it’s figuring out which part of your drivetrain is actually making the noise. The chain, cassette, crank, and bottom bracket all occupy the same general neighborhood, and sound travels weird on a bike frame.
Here’s what I learned: systematic isolation works. Before you spend money replacing anything, you need to know exactly where the noise originates. That’s what we’re doing today.
Isolate When the Noise Happens
This is the diagnostic foundation. Everything else depends on nailing this step down.
Start by pedaling in different conditions and documenting what happens. Not just “it makes noise”—be specific about when.
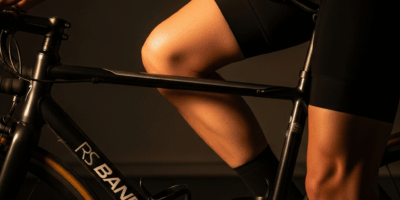
Test under load versus freewheeling. Climb out of the saddle in a hard gear and listen. Now coast downhill without pedaling. Does the noise disappear when you’re not applying power? That tells you immediately whether you’re dealing with a pedal stroke-dependent issue — chain, crank, bottom bracket — or something that’s grinding regardless, like cassette wear or frame damage.
Seated versus standing. Sit down and pedal at moderate effort. Now stand up and deliver power. The noise gets louder standing? You’re probably hearing a crank or BB issue, since you’re transferring more lateral force to those components. Noise is the same seated and standing? Look elsewhere.
Specific gear ranges matter. Small chainring and small cog? Medium-range gears? Big ring, big cog? Noise that appears only in specific gear combinations often points to cassette misalignment or chain tension inconsistency. Across all gears, though? That suggests the chain itself or the BB.
Probably should have opened with this section, honestly. I spent a month thinking my BB was destroyed when it was actually just a stiff chain link that only made noise in the middle gears where tension peaked.
Create a quick mental map — or write it down if you’re thorough. Does it click, creak, grind, or rattle? Under load only, or constant? Seated, standing, or both? All gears or specific ones? You now have enough information to move forward with actual purpose.
Check Your Chain for Stiff Links and Grime
The chain is the easiest component to inspect and the most common source of drivetrain noise. Start here.
The visual inspection. Grab your bike and rotate the crank backward slowly by hand while looking at the chain from the side. Watch the chain as it wraps around the chainring. A stiff link will create a visible hitch — the chain will catch slightly instead of flowing smoothly. You’ll see it hesitate, then snap forward.
If you spot a stiff link, that’s your noise culprit. The chain is jumping slightly under load, creating that distinctive click or pop.
The quick-spin test. Lift the rear wheel off the ground. Spin it by hand and listen closely without pedaling. If the noise persists, you’ve narrowed it down — the problem isn’t the pedal stroke triggering something. If the noise disappears, the chain is almost certainly involved.
Grime assessment. Look at the chain closely. Is it visibly dirty? Black, crusty buildup? That’s accelerating wear and can absolutely create noise as the chain struggles to articulate smoothly across the teeth. A dirty chain might not be broken, but it’s close to becoming one.
Here’s the practical decision point: Clean or replace?
If your chain is visibly grimy but doesn’t have obvious stiff links, clean it first. Use a proper chain cleaner — I use the Park Tool CG-2.4, which runs about $30 — with degreaser, or soak it overnight in old oil if you’re budget-conscious. A cleaned chain often resurrects itself for 200+ more miles.
If you found stiff links during the rotation test, cleaning might help temporarily, but replacement is inevitable. Stiff links indicate metal fatigue. They’ll just get worse. A quality chain like Shimano 105 or KMC X11 costs $30–50 and lasts 2,000–3,000 miles depending on conditions. That’s worth it. Fix it now instead of waiting for the link to snap mid-ride.
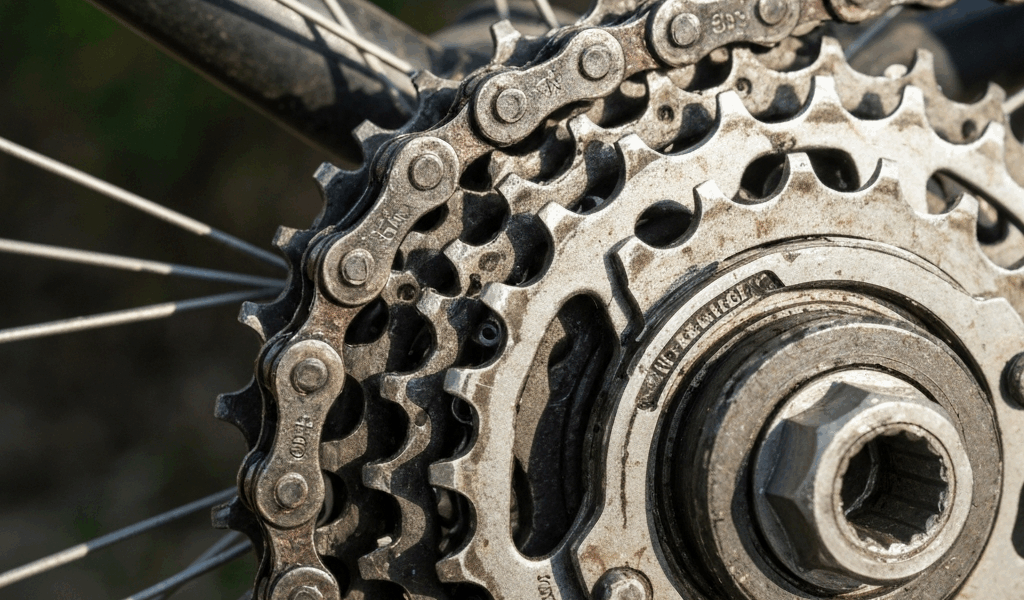
Inspect Cassette Teeth and Sprocket Alignment
The cassette is trickier to diagnose without removal, but you can spot most problems just by looking.
Wear patterns. Spin the crank backward and watch each cog as the chain passes over it. Badly worn teeth will look sharpened or pointed instead of rounded at the top. If the teeth look like shark fins, replacement is overdue. Worn teeth skip under load and create clicking as the chain bounces between engagement points.
Bent teeth. If you’ve crashed recently or hit a large pothole, individual teeth can bend. A single bent tooth creates a rhythmic noise every time the chain reaches that tooth — you’ll hear it once per cassette rotation. Inspect closely, especially the sprockets you use most, since middle cogs get worn fastest and are prone to damage.
Misalignment with chain. This is harder to spot but critical. The cassette should sit perfectly perpendicular to the chain line. If it’s angled even slightly, the chain rubs and makes noise. Remove the rear wheel and look at how the chain sits on the smallest cog. It should be centered and square. If it’s angled off, the lockring might be loose, the cassette body might be damaged, or the freehub is worn.
Fixing cassette issues: If it’s just a few bent teeth on an otherwise healthy cassette, you can sometimes bend them back carefully with pliers — not ideal, but it works in a pinch. Better solution is replacement. A 10-speed or 11-speed cassette costs $35–120 depending on the groupset. If your chain is old and your cassette is worn, replace both together. Pairing a new chain with a worn cassette creates shifting issues within weeks.
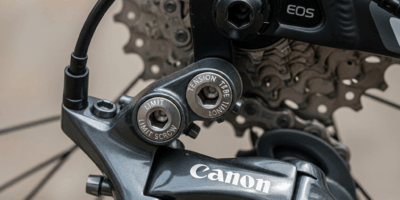
Verify Crank Arm and Bottom Bracket Tightness
This section separates crank noise from BB creaking, since they feel similar but require different fixes.
Crank arm bolts. Your crank arms bolt to a spindle at the bottom bracket. These bolts loosen over time, especially on bikes that see heavy use or have experienced falls. A loose crank arm creates a clicking or clunking noise that gets worse under load and when you’re standing.
Check this first: Grab the crank arm near the pedal and try to wiggle it side-to-side. Does it move? More than a millimeter of lateral play means the bolts need tightening. You’ll need a crank puller tool — some cranks use an 8mm Allen key, others need a specific tool, so check your crank specs — and a torque wrench.
Tighten crank bolts to manufacturer spec, usually 12–15 Nm for most Shimano road cranks. Don’t guess on torque here. Over-tightening strips threads; under-tightening means the noise returns in two weeks.
Bottom bracket clicking versus creaking. A creaking BB is usually a headset or seatpost issue since those involve lateral movement under load. A clicking or knocking BB is typically play in the spindle or loose dust caps. Grab the crank arm and try to rock it toward and away from you — front-to-back. Any movement? The BB has play.
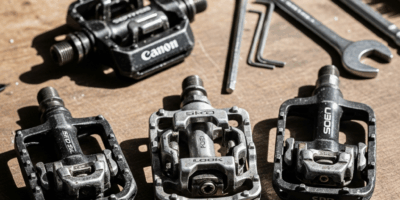
Pedal spindle play. Don’t overlook the pedals. Grab each pedal and try to wiggle it. If there’s side-to-side movement, the pedal bearing is shot. Pedal noise is easy to mistake for drivetrain noise because the sound comes from the same area. Replace the pedal ($40–80 depending on quality) rather than rebuild it; bearing replacement is labor-intensive.
When to Clean vs. Replace Components
By now you’ve identified the noise source. Here’s the decision tree.
Grime and dirt. If the chain is dirty but structurally sound, clean it. Clean the cassette with a brush and degreaser. Clean the chainring teeth. Cost: $0–20 in cleaning supplies. Expected result: Noise disappears in 80% of cases where the issue was lubrication-related rather than wear.
Stiff chain links. Replace the chain. $30–50. Don’t waste time trying to save a chain with metal fatigue.
Worn cassette teeth. If more than two cogs show significant wear, replace the entire cassette. $35–120. Replacing individual cogs is rarely worth it; you’ll still have misalignment issues between old and new teeth.
Loose crank bolts. Tighten them. Free. Re-check after 50 miles and again after 200 miles. Newly tightened bolts sometimes shift slightly under initial load.
Bottom bracket play. If the BB is cartridge-style — threaded cup design — replacement is the only fix. $30–80 depending on quality. Press-fit BBs are messier since they’re common on newer frames; the frame may need professional work.
Cost-benefit reality: A chain costs $30–50 and lasts 2,000 miles. A cassette costs $50–120 and lasts 3,000–5,000 miles. A bottom bracket costs $40–100 and lasts 5,000+ miles if maintained. The cheapest approach is preventive maintenance — clean your chain every 100 miles, inspect it every 500 miles, replace it before it damages your cassette.
That’s the diagnostic framework. Isolate the noise, identify the component, assess whether it’s fixable by cleaning or requires replacement. Most drivetrain noise issues resolve with $20–60 in parts and an hour of your time. Don’t overthink it.
“`

Leave a Reply